Landblog Main
previous archive
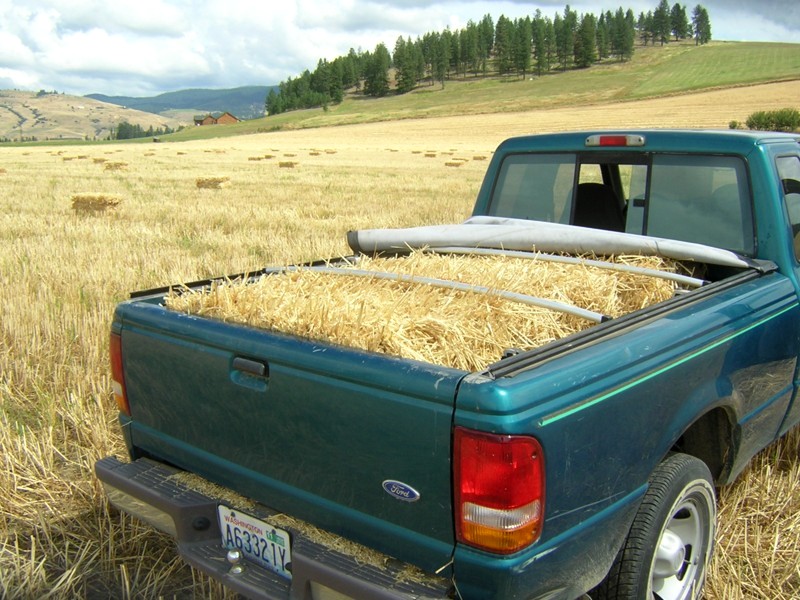 Got Straw -- 11 August 2010 -- Wheat harvest has been going on for a few weeks now, and finally someone offered fresh straw on craigslist, and cheap, only $1.25 a bale! It was in Kettle Falls, an 80 mile drive north of here, but it was a nice day for a drive and I had never been up there. Along the way I picked up two hitchhikers, a young hippie from Connecticut and a woman from Belarus, who were on their way to a Rainbow gathering. I dropped them off and found the farmer, who led me to the field in the photo. The bales were just barely small enough that I could cram four of them in the truck and still get the cover on in case it rained. Then I took a nice shortcut to drop them off at the land, driving up Flowery Trail Road from Chewelah to Usk.
A second shortcut, taking the "back road" through the hills on the other side of my land, didn't work out so well. It looked simple on the internet, but in practice there were unmarked forks and roads that got worse and worse. Finally I gave up and took the long way around. Later when I got back, I zoomed in really close on Google maps and discovered that the satellite photo does not show a road where the overlay shows a road! [Update: later I tried exploring on foot from the other direction, and all roads dead end in private property. My neighbor tells me that the road used to go through and somebody who lives on it made it impassable.]
Anyway, now I have four really nice bales under a tarp on pallets, and at least one visitor coming this weekend to help build cob.
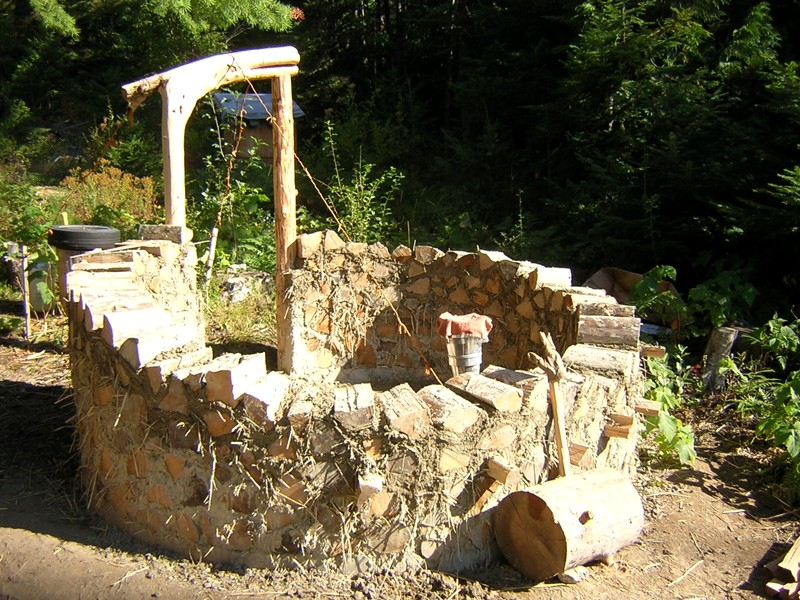
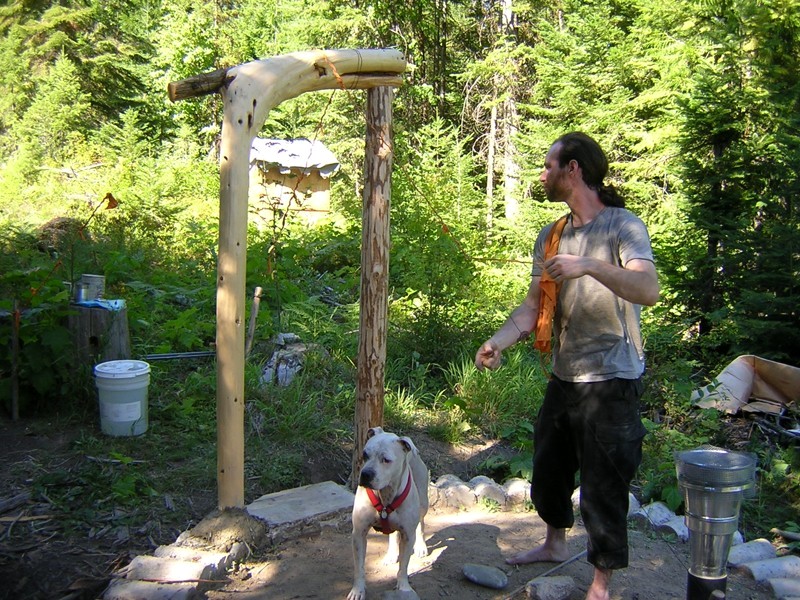 Woodhenge -- 18 August 2010 -- "In ancient times, hundreds of years before the dawn of history, lived a strange race of people... the Druids." Seriously, in the photo you can see Chuck and Agamemnon, who came up to help with this year's project and clumsily stalk chipmunks, respectively. The wooden thing is a door frame, with the curved part made out of a western redcedar, and the straight part made out of a grand fir. The fir was already dead and I killed the cedar for exactly this purpose. It was growing upside down from how you see it.
Chuck has some construction engineering skill, and we decided to join the two pieces of wood with a mortise and tenon joint. Those links go to photos that were taken when both were still in crude form. I forgot to bring a chisel, so we roughed out the perimeter of the mortise with a drill, and then got the center out and smoothed the edges with a mini hatchet, a mallet, the sharp part of a hammer, and a whittling knife. It helped that the center of the log was rotted out. The tenon just took some sawing. I made the mistake of cutting the tenon a little big, figuring that we could always make it smaller. But then it took me a long time to get it small enough to fit.
 Then we had to fit the parts together so that the legs were parallel, cut some wood off the bottoms of the legs so the whole thing stood up straight at the right height, and cut away some wood so that we'd have a smooth joint, which you can see in the photo. The "O" was to remind us which side of the log faced the outside of the structure. Chuck was a good sport about holding the thing up while I checked it with a level and figured out how much wood to cut. I made some lucky guesses and we still had to stand it up and set it down a few times.
Then we had to figure out how to hold it in place for the next month or two until the walls are filled in around it. I was going to use long pieces of wood nailed to the frame and braced against the ground, but Chuck had the clever idea to use a tripod of wires and stakes. In the photo up top he's wrapping the remains of an orange t-shirt around a wire so people don't run into it. And the bottoms of the frame are held in place with cob...
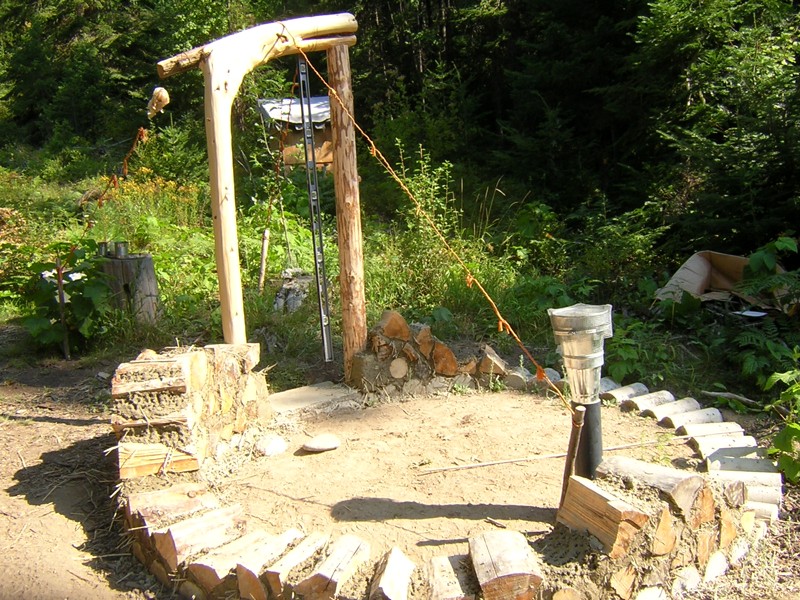 Cobbing Begins -- 18 August 2010 -- Here you see the beginnings of a cordwood cob wall, a.k.a. cobwood. Chuck and I are beginners, and we probably did this in about five hours over two days. We're digging pre-mixed sand and clay out of the pit, and some of it is half dried and needs to be mixed with wetter stuff, so we're doing that while we also mix in the straw, using the popular method of stomping on a tarp and then lifting the edge of the tarp to fold the cob over on itself. Then it's just a matter of picking out the right pieces of wood and packing the cob around them. The door frame is wired to pieces of wood on both sides. Those little holes everywhere on top of the cob are so the next layer fits more securely.
 When we imagine new "technology", we're usually thinking about space robots and happy pills, not dirt houses. But Becky Bee invented the tarp mixing method in the 1990's, and Ianto Evans made important improvements to ancient cob technology only a few years earlier. I like to think we're at the beginning of a renaissance, a conjunction between modern consciousness and ecological values. More now than at any time in human history, the people not mired in tradition, and the people trying to live in balance with other life, are the same.
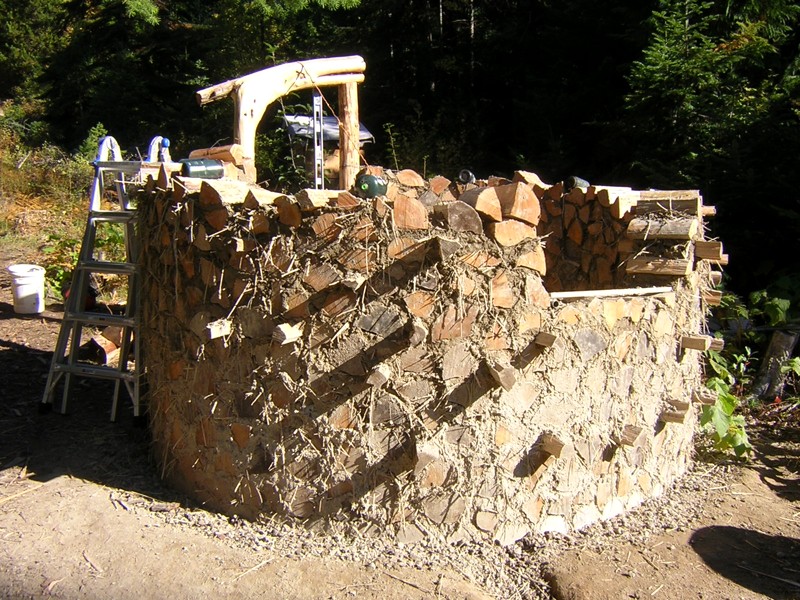
 Cost-Benefit Analysis of Cobwood -- 25 August 2010 -- I worked all day Saturday and Sunday raising this wall. On Sunday I had to quit around 5pm, not because I was out of energy or materials, but because I knew that if I did any more, I would have nightmares about it. Monday I couldn't bear to work on the wall so I did a bunch of chainsawing and drawknifing.
Natural building is not fun. It has many advantages over unnatural building: it's cheaper, the structures are more beautiful, and it is more meaningful to shape something out of materials you have cut and dug with your own hands, than out of industrial products from Home Depot. This makes it much easier to feel motivated for natural building. But the actual work, just like unnatural building, is a tedious chore.
Ianto Evans has written that he loves cobbing so much that he feels sad to finish a house. It's because freaks like him write books that the rest of us get discouraged. Someone who loves doing something -- building, writing, whatever -- will not hesitate to do twice as much work to get a ten percent better product, while gushing about how much fun it is. Then we ordinary people get bogged down in the work and think there's something wrong with us. It should be the other way around: if people who hated building wrote books about building, they would not even do eleven percent more work for a ten percent better product. They would find all the shortcuts and good-enoughs, and then, if you loved building, you could go far beyond that. Joel comments:
I think the ideal how-to book might be written in collaboration, with someone who loves the field and has explored it thoroughly supplying options that others might not see, and someone who hates the experience providing the constraints you describe.
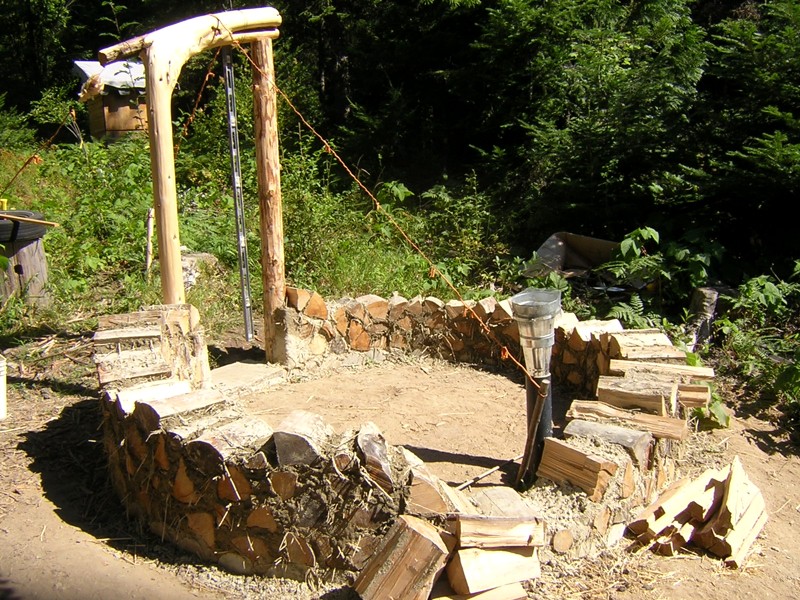
Anyway, the walls in the photo represent about 25 human-hours of work -- but that was starting with a stack of split wood and a pit of pre-mixed sand and clay. By the way, pre-mixing sand and clay more than a week in advance is a mistake. The water tends to rise to the top and evaporate, and the sand tends to sink to the bottom, and then it all needs to be reprocessed, which takes just as much work as mixing the sand and clay in the first place. I should have spent that time cutting wood.So far I have used about as much sand and clay as I expected, less straw, and much more wood. I think I figured this out last year by doing math on the volumes of the two fallen hemlock trees, and then I forgot it because it was too unpleasant. Yes, the wood in these trees is not enough for this little structure. And I can't kill more trees because the wood needs to spend two summers drying. I'll be able to find enough undecayed old fallen wood to finish the wall, but now I'm thinking...
Cobwood has an advantage over cob if you already have a big pile of cordwood. You just stick the wood in the wall and you only have to make half as much cob. But if you have to pick out trees, cut them down, take off the limbs and bark, saw them into rounds, and split them, that's actually more work per volume of wall than digging up and mixing sand and clay. Also, integrating wood and cob takes more work than just piling up cob. Also, it's easy to taper a cob wall, so it gets thinner near the top, but logistically difficult to do this with wood. Also, cordwood doesn't like tight curves, because the ends are spaced too closely on the inside and too far apart on the outside. Also, although everyone says that cobwood can hold up a roof, in practice everyone uses it to fill in between posts and beams. This little structure will be the first example I've seen of a roof-bearing cobwood wall.
My conclusion is that cobwood is only worth doing in a special case, where you already have the wood, and you're filling in straight or slightly curved walls. Otherwise, go with all cob.
Moving Heavy Stuff -- 10 September 2010 -- I am now overloaded with stuff that needs to be hauled to the land, and I almost wish I had bought an F350 instead of a Ranger. On Craigslist I found a neighbor, Brian, who lives only eight houses away and has about five tons of broken concrete (a.k.a. urbanite) from a patio. For me that's about fifteen loads. So last Sunday I drove a load up, watered plants, came back, and drove another load up on Monday. Also on Monday I met with a family friend who has a roofing business, and he followed me up to the land with 38 sheets of metal roofing (26 gauge loc-rib, 16 inches by 13.5 feet) and three rolls of #30 felt. He gave me a good deal. We tied the roofing to a tree to get it off his trailer. Then I moved the roofing sheet by sheet to where I'll be storing it, which gave me a sore lower back, and then I unloaded 800 pounds of concrete, made a fifteen gallon batch of cob, and built up the wall a bit.
The next day it was raining, I strained my lower back worse moving rocks at the spring, and I was almost ready to cover the walls with a tarp and call it a year. Instead I persisted. And I discovered that it's much easier to make one fifty gallon batch of cob than three fifteen gallon batches -- even if that fifty gallons is made in a pit from which it has to be lifted. Fifty gallons is exactly enough to go once around the wall, plastering on cob, fitting on wood, and filling in the cracks. The whole process takes about four hours.
 On Wednesday the weather was nearly perfect, and for some reason I still had good energy, so I added another layer to the wall. This got me close to the bottom of my steel barrel of clay paste, and I needed more water to make a third batch. Because I anticipated this last month, I already had a plastic barrel of water, filled from the second spring before it went dry. Water barrels are so heavy that tipping them and pouring the water is not an option, so I siphoned it with a hose. Then I returned to Spokane.
On Thursday, I found someone selling 55 gallon steel drums with lids and rings, and drove across the city to buy three dented, non-food-grade drums for $80. That's not a good deal, but steel drums are something you have to buy locally, and nobody else in Spokane is even selling them. The dents may need to be hammered out if I want to make a rocket mass heater, but they'll be fine for non-food storage. They held calcium carbide, which is used to make acetylene and is not terribly toxic. Then I went over to Brian's place four more times to haul concrete, and stored three loads here for later.
 Windows 7 -- 3 October 2010 -- From September 15-20 I was in Seattle at the Permaculture convergence, and then from the 21st to the 28th I had a visitor, Alexa. We stayed on the land for five days, but there was some rain and both of us got sick, so we only managed to get three more courses of wood on the wall. Also we did some splitting. I highly recommend splitting a more difficult wood first, and then switching to cedar. It's like you just wave your axe and the cedar splits itself. Anyway, this is what the wall looked like after Alexa helped, and after I put a little more on myself. At this stage, the best thing about having a helper is that one of us can stand on each side of the wall to make sure the wood fits right, and pack the cob around it. Alone I have to keep running in and out to look at both sides. Notice the piece of wood in the gap at the front. That represents the width of something in the next stage, and six empty propane canisters mark the locations of something else.
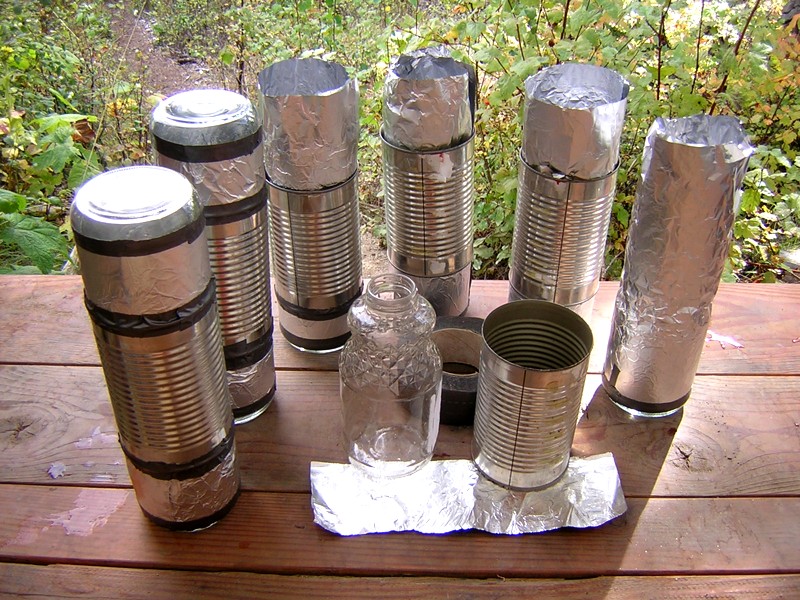 These are bottle windows, a common feature in cob buildings. There are different methods for making them. I noticed that 32 ounce glass juice bottles fit perfectly inside 40 ounce Dinty Moore beef stew cans, which I got for $4 each from Grocery Outlet. Also included was the stew, which was nourishing even though it smells like dog food. The photo shows all necessary materials, except one thing: to keep the whole thing under 13 inches, at least one of the bottles needs to have the top cut off. I did this with a strange bottle cutting kit that I picked up a few years ago. Bottle cutters generally score the glass and then you have to heat and cool it to break it at the score. Some of them cracked, which I patched with duct tape. It was also tricky to keep the foil smooth inside the tube, instead of bunching up and blocking the light.
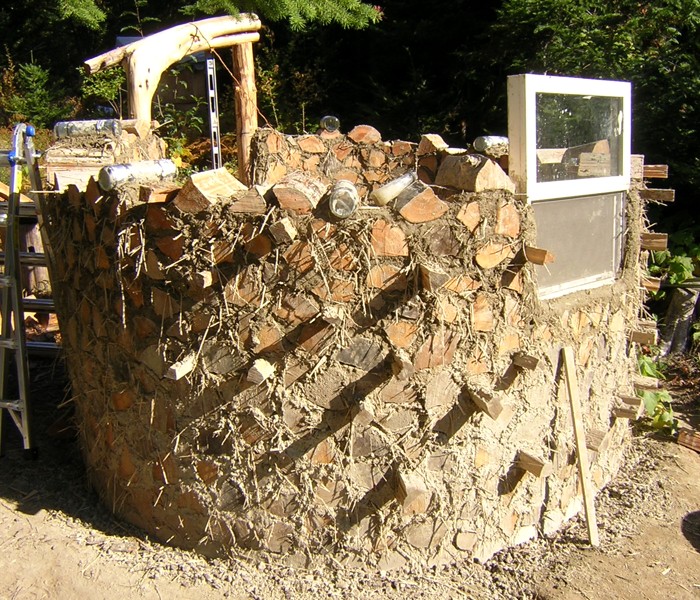 And here's the wall with everything installed and a bit more cob and wood added. Thanks Bob for donating the big window. It has double-paned glass, a screen, and it opens and closes. You can't really see it here, but I've put a stainless steel wire across the front, wrapped around logs on either side, to keep it from falling out. It can't fall in because the angle of the wall stops it. You can't see all the bottle windows, but there are three on each side, lower toward the front and higher toward the door. They say to put them at eye level, so this covers eyes of different heights of people. The pieces of wood sticking out have a purpose, which will eventually be revealed.
Also on the latest trip, I finished mixing the fourth and final barrel of clay-water mix. I do this by first filling a 55 gallon steel drum half full of water, and then tamping or hand-crumbling many buckets of clay and stirring them in. And I did a bunch more chainsawing. The hemlock that was supposed to supply the whole project only went half way, so I've had to use every scrap of cedar that I was saving for a future project, plus start scavenging the old slash piles for more cedar.
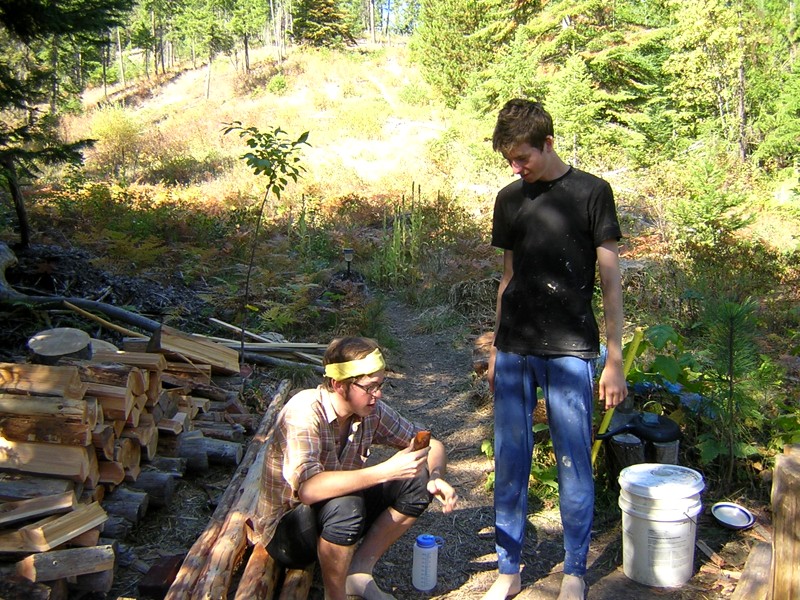 Visitors and Mushrooms -- 10 October 2010 -- These are Ethan and Ian, who hitchhiked across the state to help out. Because they're similar in many ways, at first I got them confused, and I kept thinking of the film Rosencrantz and Guildenstern are Dead. Anyway, I drove them up last Monday, and by the end of the day on Tuesday they were mixing cob and building wall, giving me time to chainsaw enough old cedar for the rest of the structure. The slow drying of the wall limited the speed we could put cob on, so they ended up doing a lot of splitting, and then some unexpected rain on Thursday stalled the project and left about 60 gallons of unapplied cob.
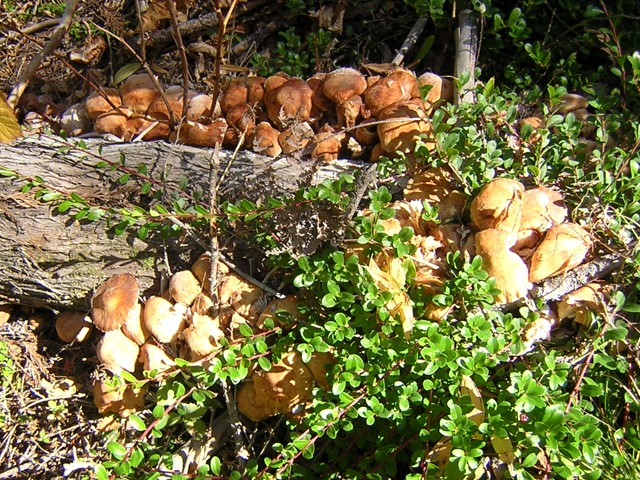 The wet spring, summer, and fall have made this the best year yet for fungi. We went on a mushroom walk and found lots of boletes, but none of the tasty ones, lots of purple-capped Russulas, and some Lactarius rubrilacteus. This photo shows a large fruiting of Armillaria mellea, or honey mushrooms. It took me a while to be sure of the identification because many of the stems had no rings. Then I cooked up a big panful in bacon grease and ate them, while the other guys prudently just took little nibbles. That wood they're growing on is a western redcedar that just recently died. So it appears that honey fungus could be causing the cedar dieoff in the area, although I still think the deeper cause is climate change, which has either weakened the cedars or made an environment more friendly to the fungus.
On Friday, I drove the guys back to Spokane and dropped them at the Maple street on-ramp. I went into McDonalds to use the bathroom and when I came out they were already getting a ride! At this point, while I'm still open to visitors, the weather will determine whether I finish the structure before winter.
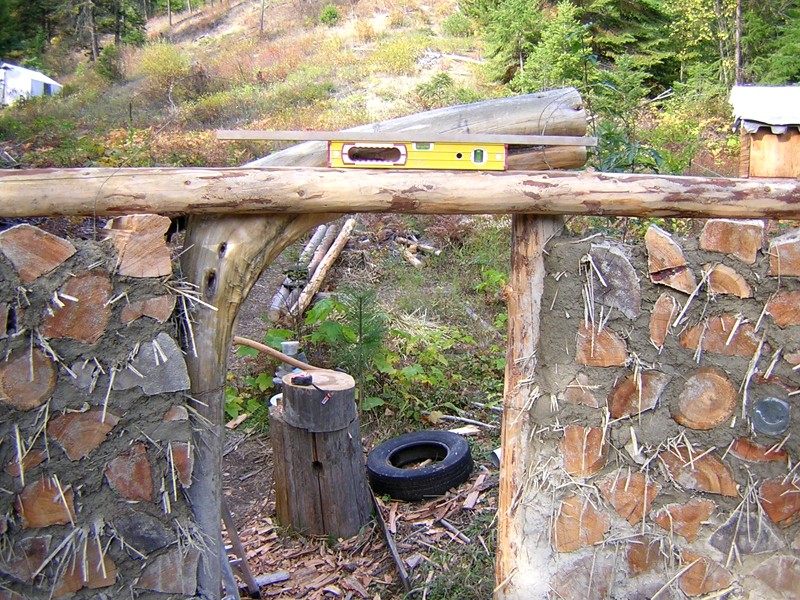 Lintel -- 16 October 2010 -- On this trip, using week-old cob that only needed some wetting and re-stomping, I built the walls around the door frame high enough to begin placing the roof beams. This photo shows something I've been thinking about, and when I got to this point, it became obvious. Mainly the lintel makes it much easier to place one of the beams. That piece of wood on top of the level is cut to the width of the window, which fits between the two center beams on the other side. So on this side, it marks the space between the beams, with one of them going to the right of the door frame, and the other going above the low side of the frame. Originally I was going to rest it on top of the sloping frame, which would raise two problems: how to hold it there, and how to get all the beams parallel and level, if one of them can't be moved side to side without also moving it up and down. The lintel solves both problems. Also it makes a platform to fill in the walls above the door.
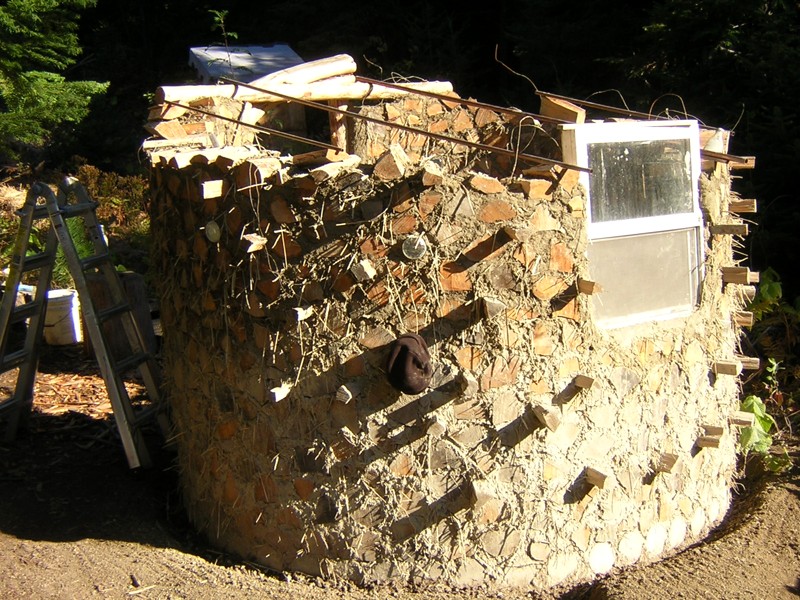 Here you see some beams parallel and level. I love this kind of work! These pipes mark the locations of the beams, and I spent more than an hour fiddling with them, measuring the distance between them and lining them all up with my eye, until I could see all four positions and know how high to build the cob and wood under them. Also notice the wires, which are wrapped around wood buried in cob and will be wrapped around the beams.